Introduction
The Laser Absorbent Panel is a digital manufacturing solution to reduce the reverberation of a room. Absorbent panels are the first acoustic elements we introduce in a recording or control room.
Tools and Materials

- Laser Cutting Machine: A laser cutting machine with a cutting area of 600×900 mm should work.
- 3mm MDF boards: Recommended wood type.
- Fabric Canvas: Any regular canvas should work, so you can get as creative as you want. If you can breathe through the fabric, it works 😉
- White Glue: Simple old fashion white glue.
- Scissors: Cutting fabrics requires extra sharpness, remember that 🙂
- Glue Gun: Any cheap glue gun is valid. It costs 10€ approx.
- 40mm rock wool or fiberglass: Best results use 40-70 Kg/m3 and 4cm thickness for this design. If you are in Europe, you can also use a recycled fabric material called Geopannel which you can buy at Leroy Merlin all over Europe.
Safety tips
- If you choose rock wool as your absorbent material, remember to wear a mask and safety gloves. Rock wool is very itchy and not healthy to bread around. Also is very important that the Laser Panel is sealed.
- It’s a good idea to cover the table where you choose to work, so it does not get stained with hot glue or white glue.
Step 1: Take the CAD to a local laser machine
Download this CAD v1.4.4 file and take it to a laser machine. If you live next to a FabLab, you can contact them to know when there is an open day.

Test your dimensions & material specifications
When we use .dxf files, not all software maintains its original dimensions. When the original dimensions have changed, we need to rescale the .dxf file to the original size. We provide a diagram, so you know you are on the right track (don’t worry if you are not familiar with cad files, the person operating the Laser Machine will know).
Step 2: Glue the frame pieces together
They are designed so they can not be mounted the wrong way. If they fit, you’re doing great. We recommend that you fit the pieces together while pressing them horizontally on a table.
Before you start working group, all frame pieces together. You will realize that half of them have engravings facing down and the other half facing up. Just make two groups and you are ready to go.
Don’t try to fit them without glue, it is quite hard to take them apart after they are joined together 😉
Step 3: Glue the fabric to the frames
Before we start, we need to prepare fabric rectangles measuring 58x58cm. To glue the fabric to the frames, we will use a hot glue gun. First, start with one corner and tighten the fabric as you move on the other three corners.
Make sure the engravings of the wood frame are facing down.
Finish sealing: Continue along the sides, pulling the fabric towards you as you glue it.
Step 4: Attach the ‘pestañitas’ to the box pieces
Pestañitas are the small pieces that hold the box and the frames together. When attaching them with the box pieces, you will feel and hear a click. If one breaks, don’t worry, there are extra ones.
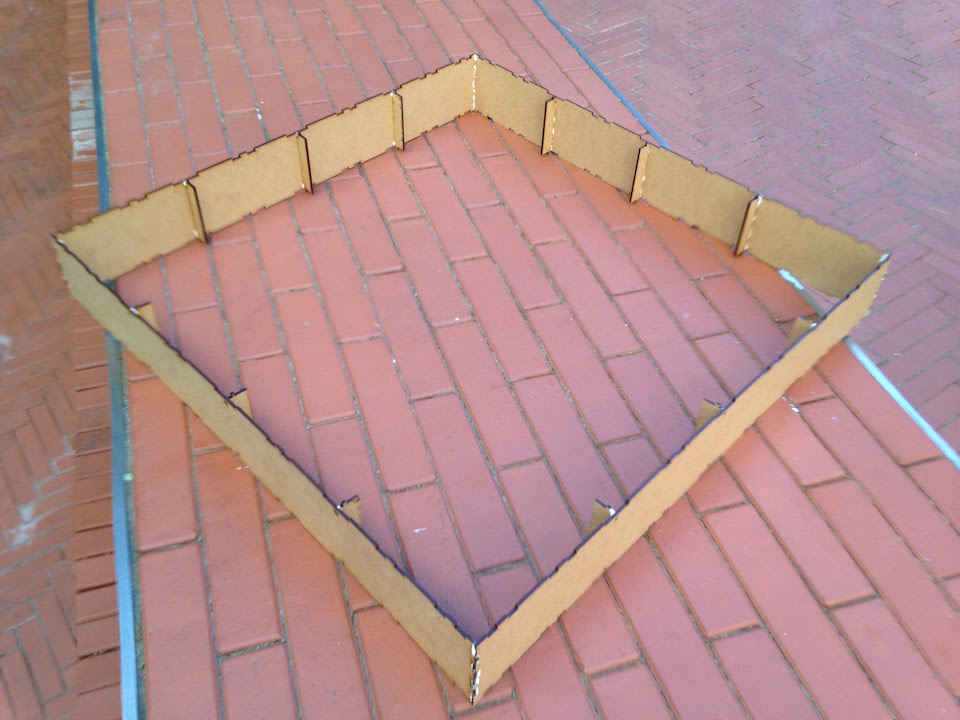
Step 4: Put the box pieces together
Glue one box at a time. This is important because the glue dries relatively fast. Remember you are gluing in two dimensions. All contact surfaces must have glue.
Stick the box pieces together.
Step 5: Join the bottom frame with the box
Glue the top edge for comfort. Remember all contact surfaces must have glue.
Align the pieces and press with care.
Step 6: Insert the rock wool into the box
Start cutting rock wool (or fiberglass/geopannel) rectangles measuring 60x60cm and 4cm in thickness.
Then insert gently two rectangles of rock wool (or fiberglass/geopannel) into the box and remove the excess material.
Step 7: Close the box
Repeat step 5. Make sure the rock wool is not too tight.
The Finished Laser Panel
Now you should have your very first Laser Absorbent Panel in your hands. I hope it looks great, but don’t worry if it’s not perfect. You will do it better with the next ones now that you know the process.

